Generating a Database-backed API
DreamFactory's capabilities are vast, however its most popular feature is the ability to generate a database-backed REST API. By embracing this automated approach, development teams can shave weeks if not months off the development cycle, and in doing so greatly reduce the likelihood of bugs or security issues due to mishaps such as SQL injection. This approach doesn't come with any trade offs either, because DreamFactory's database-backed APIs are fully-featured REST interfaces. They offer comprehensive CRUD (create, retrieve, update, delete) capabilities, endpoints for executing stored procedures, and even endpoints for managing the schema.
This topic details DreamFactory's ability to generate, secure, and deploy a database-backed API in just minutes. We've included infomation to help you successfully complete the following tasks:
- Generate a new database-backed REST API
- Secure API access to your API using API keys and roles
- Interact with the auto-generated Swagger documentation
- Query the API using a third-party HTTP client
- Synchronize records between two databases
We chose MySQL as the basis for examples throughout, because it is free, ubiquitously available on hosting providers and cloud environments, and can otherwise be easily installed on all operating systems. To follow along, ensure you have the following:
- Access to a DreamFactory instance and a MySQL database.
- If your MySQL database is running somewhere other than your laptop, ensure your firewall is configured to allow traffic between port 3306 and the location where your DreamFactory instance is running.
- A MySQL user account configured so that it can connect to your MySQL server from the DreamFactory instance's IP address.
Before we begin, keep in mind that MySQL is just one of 18 databases supported by DreamFactory. The following table presents a complete list of what we support:
| Databases | SQL and No SQL |
|---|---|
| AWS DynamoDB | IBM Informix |
| AWS Redshift | MongoDB |
| Azure DocumentDB | MySQL |
| Azure Table Storage | Oracle |
| Cassandra | PostgreSQL |
| Couchbase | Salesforce |
| CouchDB | SAP SQL Anywhere |
| Firebird | SQLite |
| IBM Db2 | SQL Server |
Best of all, thanks to DreamFactory's unified interface and API generation solution, everything you learn in this topic applies identically to your chosen database! If you plan on using another database, then by all means follow along using it instead!
Looking for a more concise overview of the database API generation process? Check out our blog post, "Create a MySQL REST API in Minutes Using DreamFactory"!
Want to create a MySQL API but don't have any test data? You can download a sample database from the MySQL website containing several million records of contrived employee-related data. Click here to learn more and install the example database. If you've started a DreamFactory hosted trial then we've created this database for you! Your welcome e-mail includes the necessary credentials.
Generating a MySQL-backed API
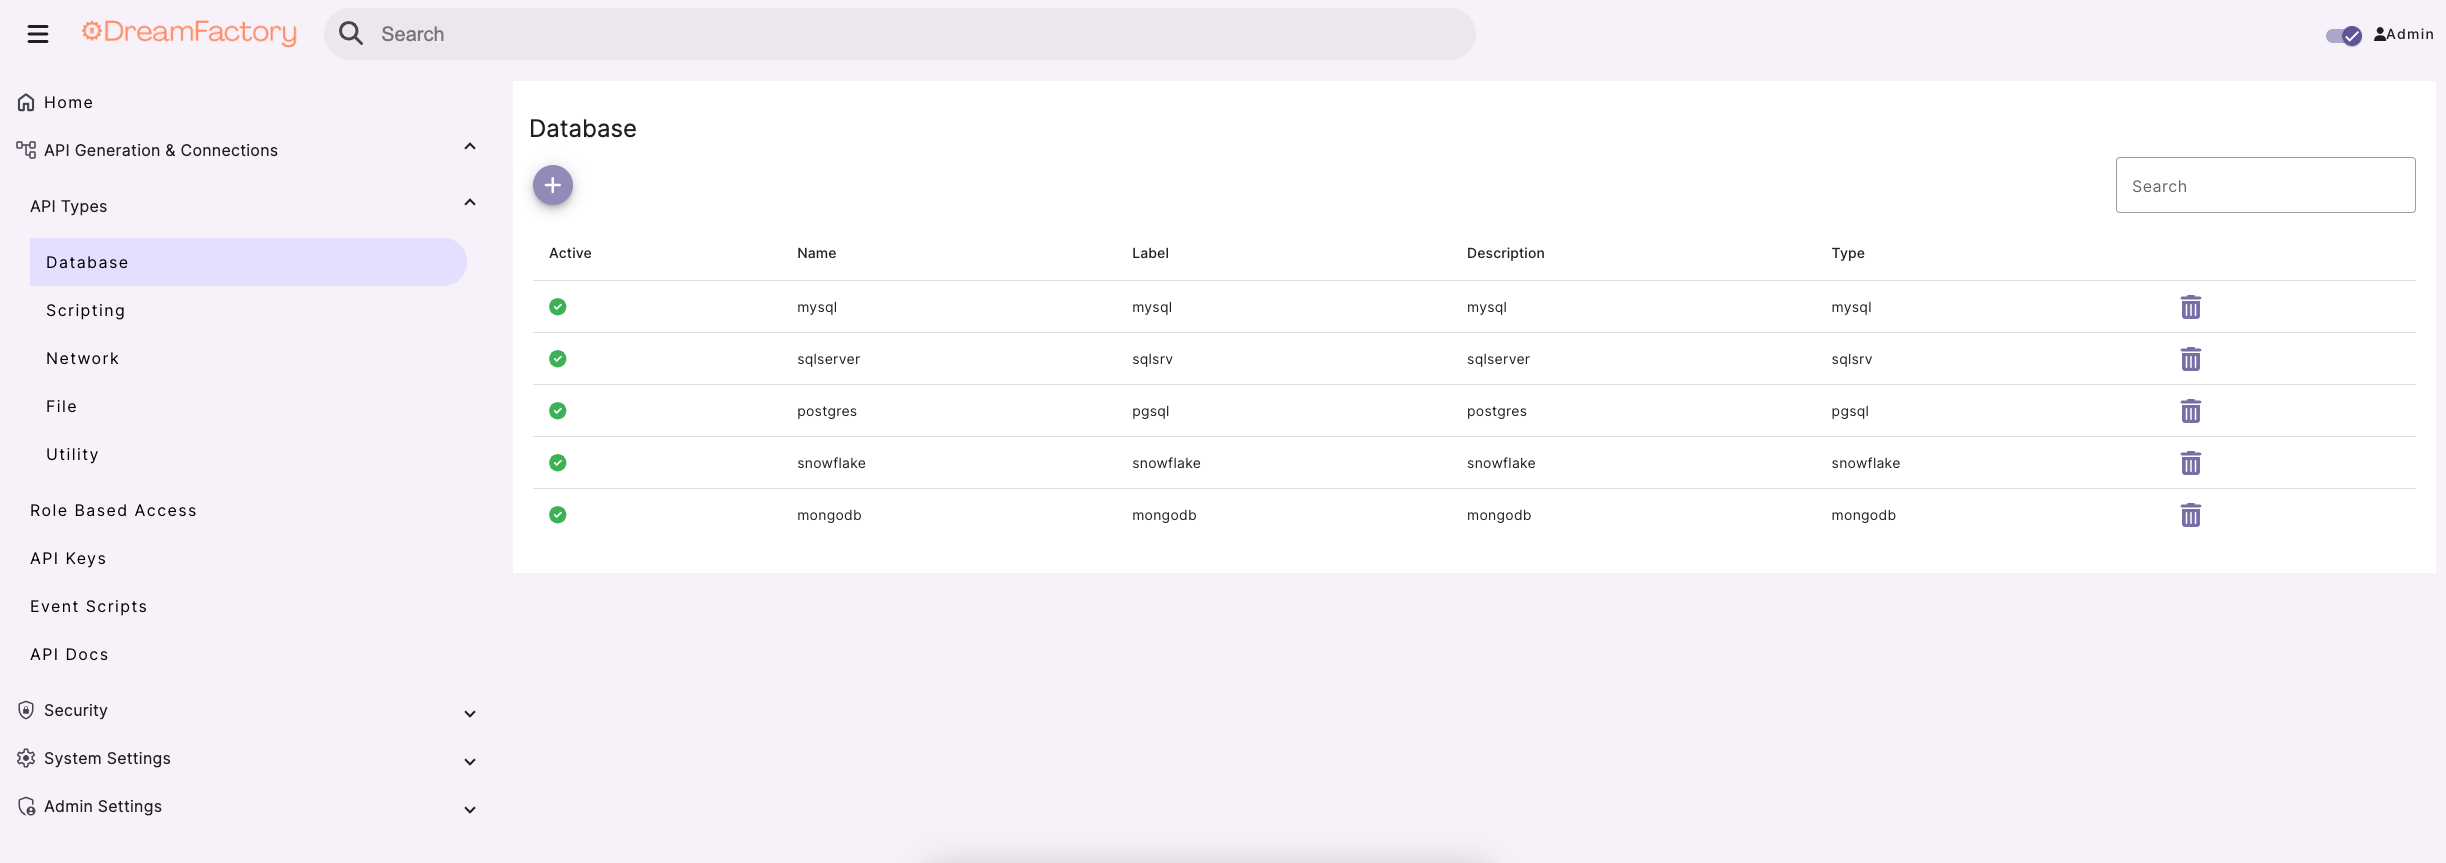
To generate a MySQL-backed API, log in to your DreamFactory instance using an administrator account and select the API Generation & Connections tab. Set your API Type to Database, and then click the purple plus button to establish a new connection:
Numerous database types such as MS SQL Server, Oracle, Snowflake, and more are available. There's a lot to review in this menu, but for the moment let's stay on track and search for MySQL:
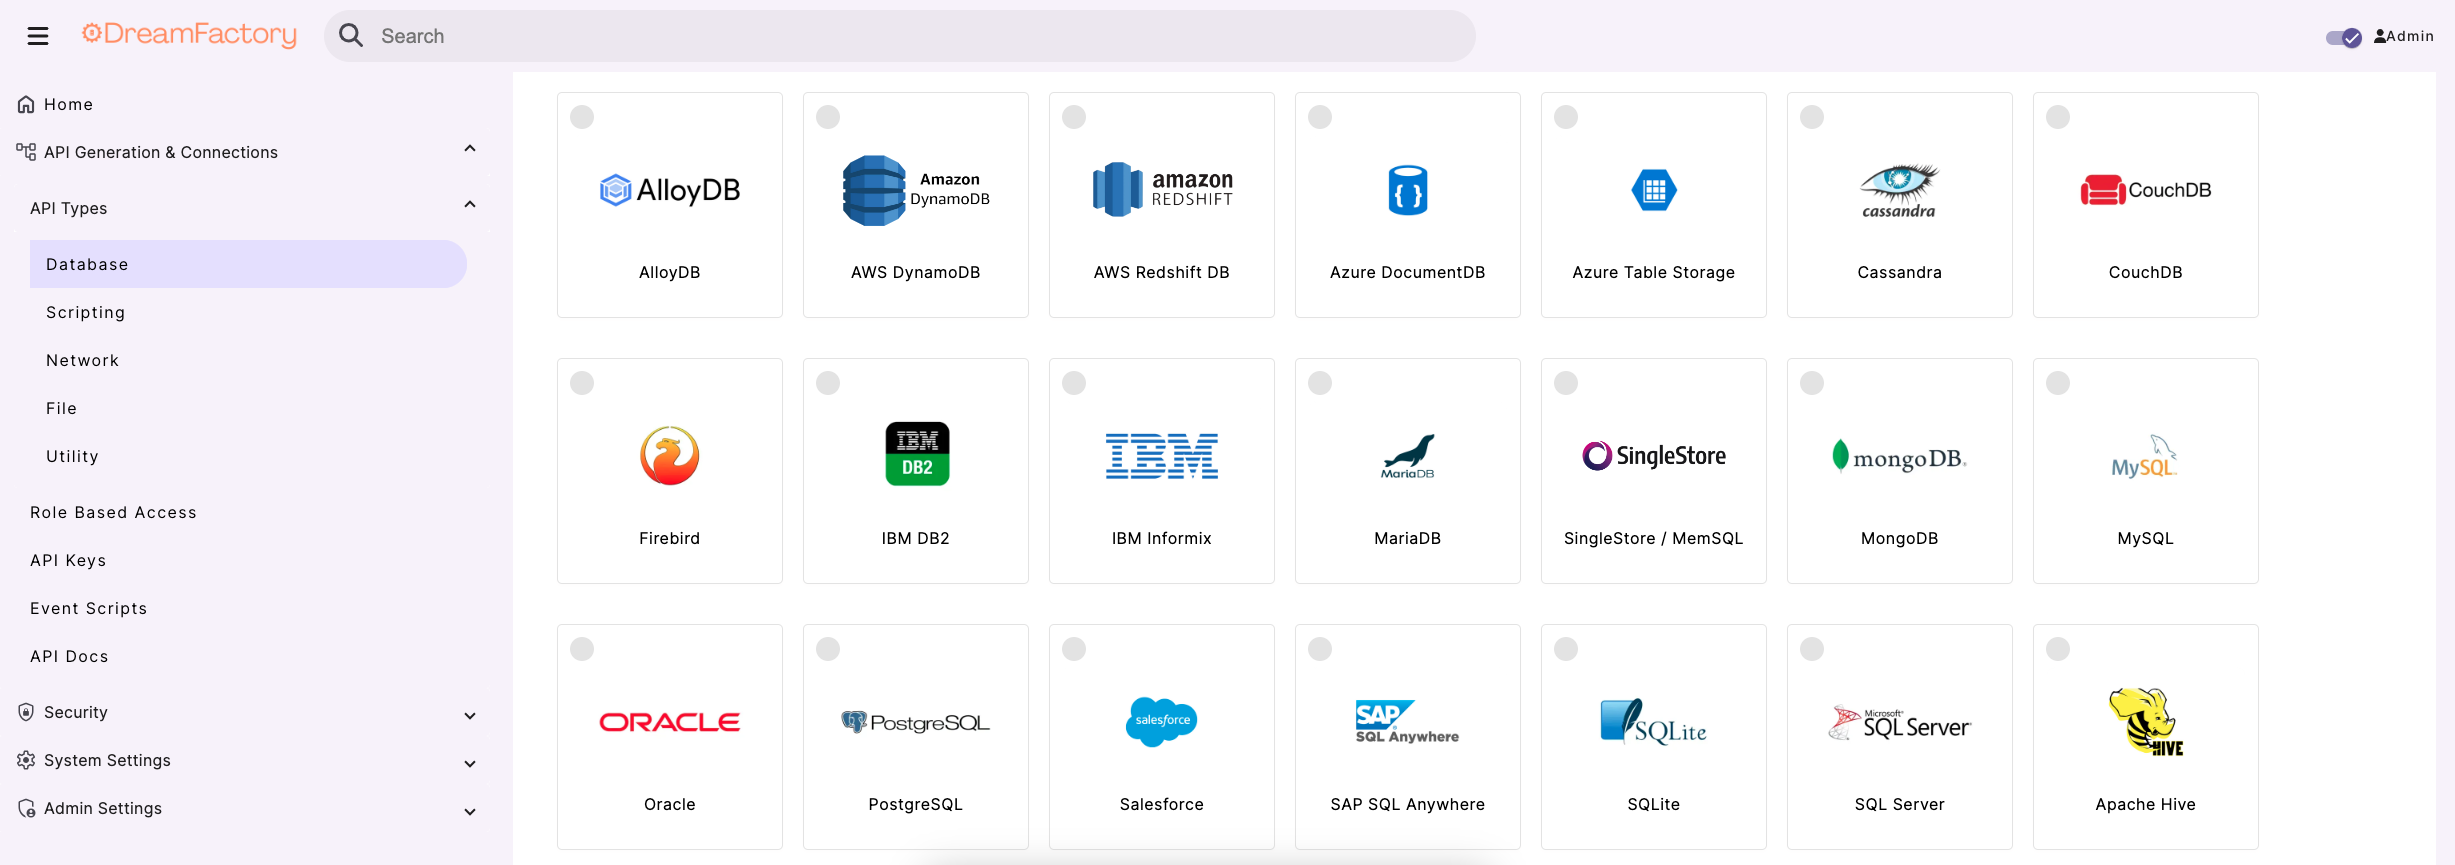
Select MySQL, and you are then presented with the following form:
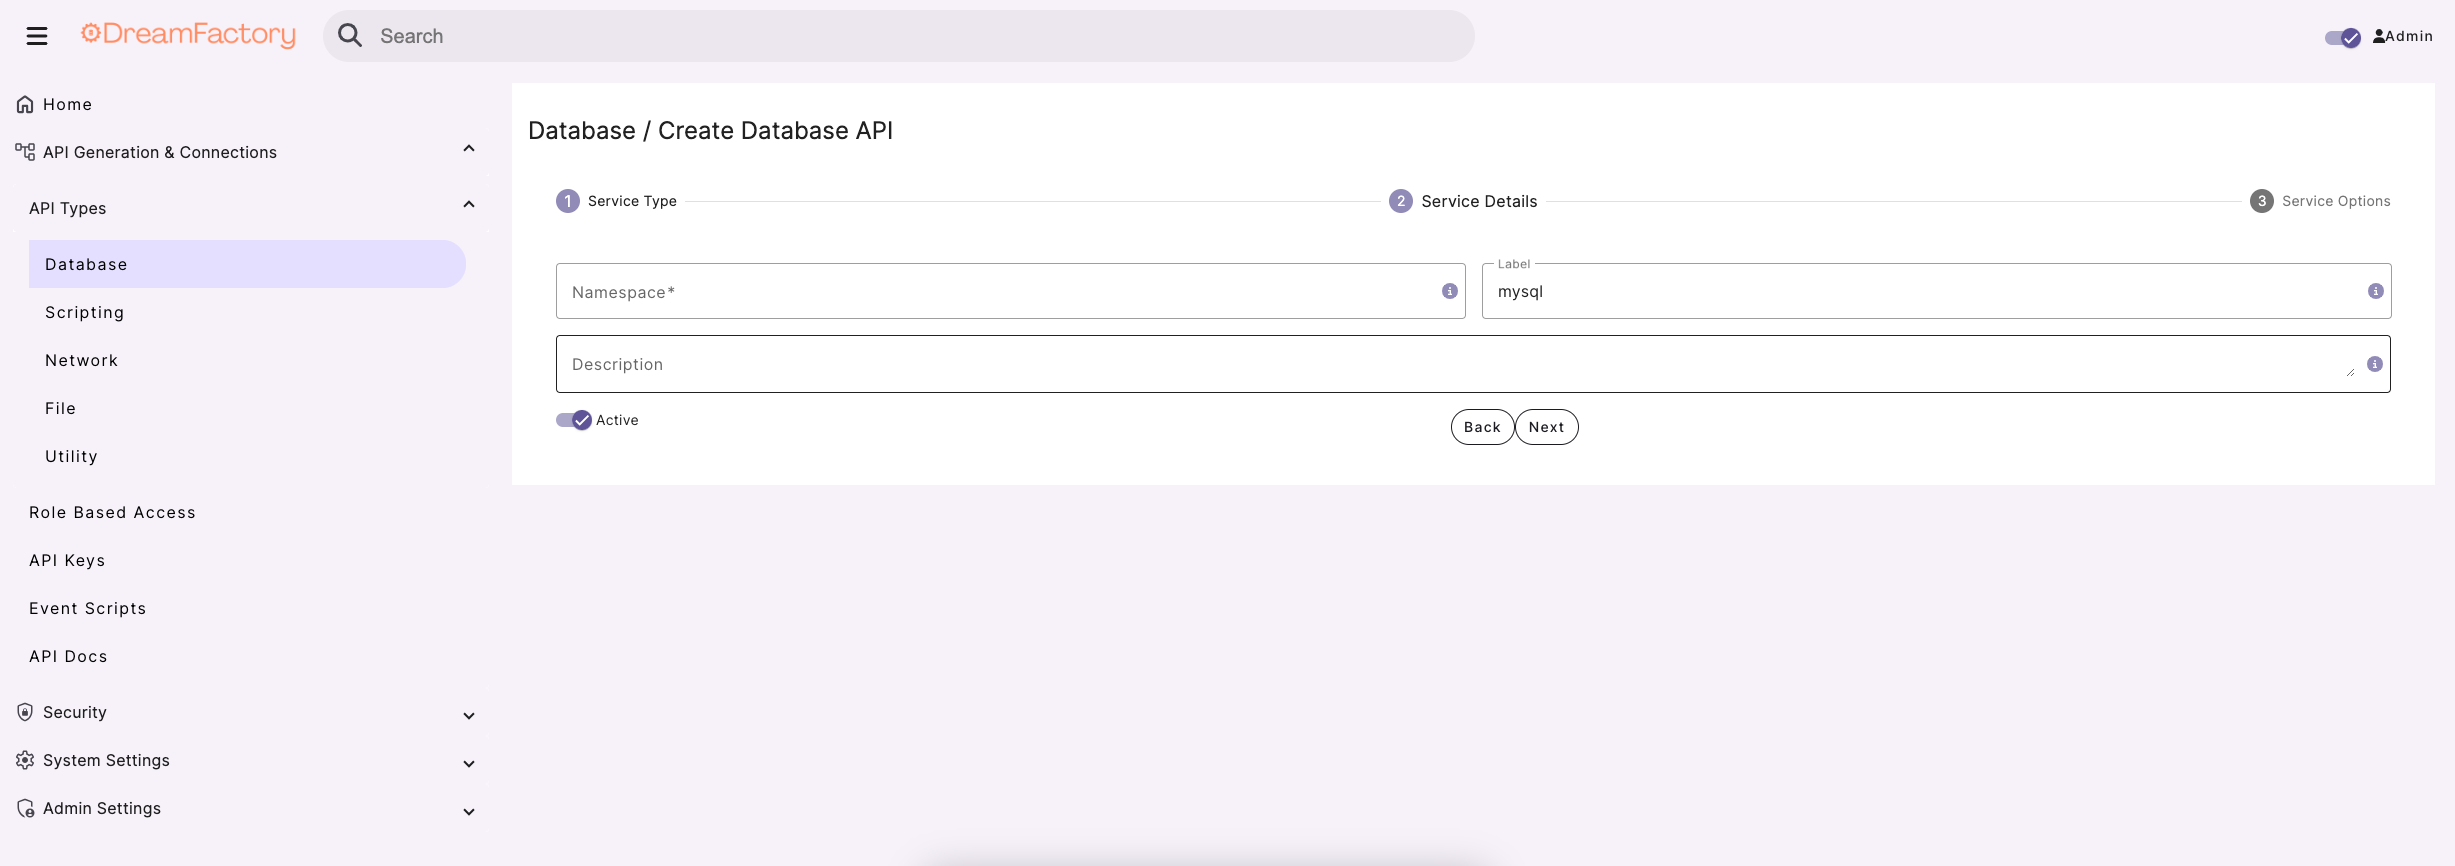
Let's review the available fields:
- Name: The name forms part of your API URL, so ensure you use a lowercase string with no spaces or special characters. You also want to choose a name that allows you to easily identify the API's purpose. For instance for your MySQL-backed API you might choose a name such as
mysql,corporate, orstore. Keep in mind lowercasing the name is a requirement. - Label: The label is used for referential purposes within the administration interface and system-related API responses. You can use something more descriptive here, such as "MySQL-backed Corporate Database API".
- Description: Like the label, the description is used for referential purposes within the administration interface and system-related API responses. We recommend including a brief description of what the API is used for.
- Active: This toggle determines if the API is active or not. By default it is set to active, however if you're not yet ready to begin using the API or would like to later temporarily disable it, just return to this screen and toggle the checkbox.
After completing these fields, click Next at the bottom of the interface and the following form displays. We've only included the top of the form as it is fairly long:
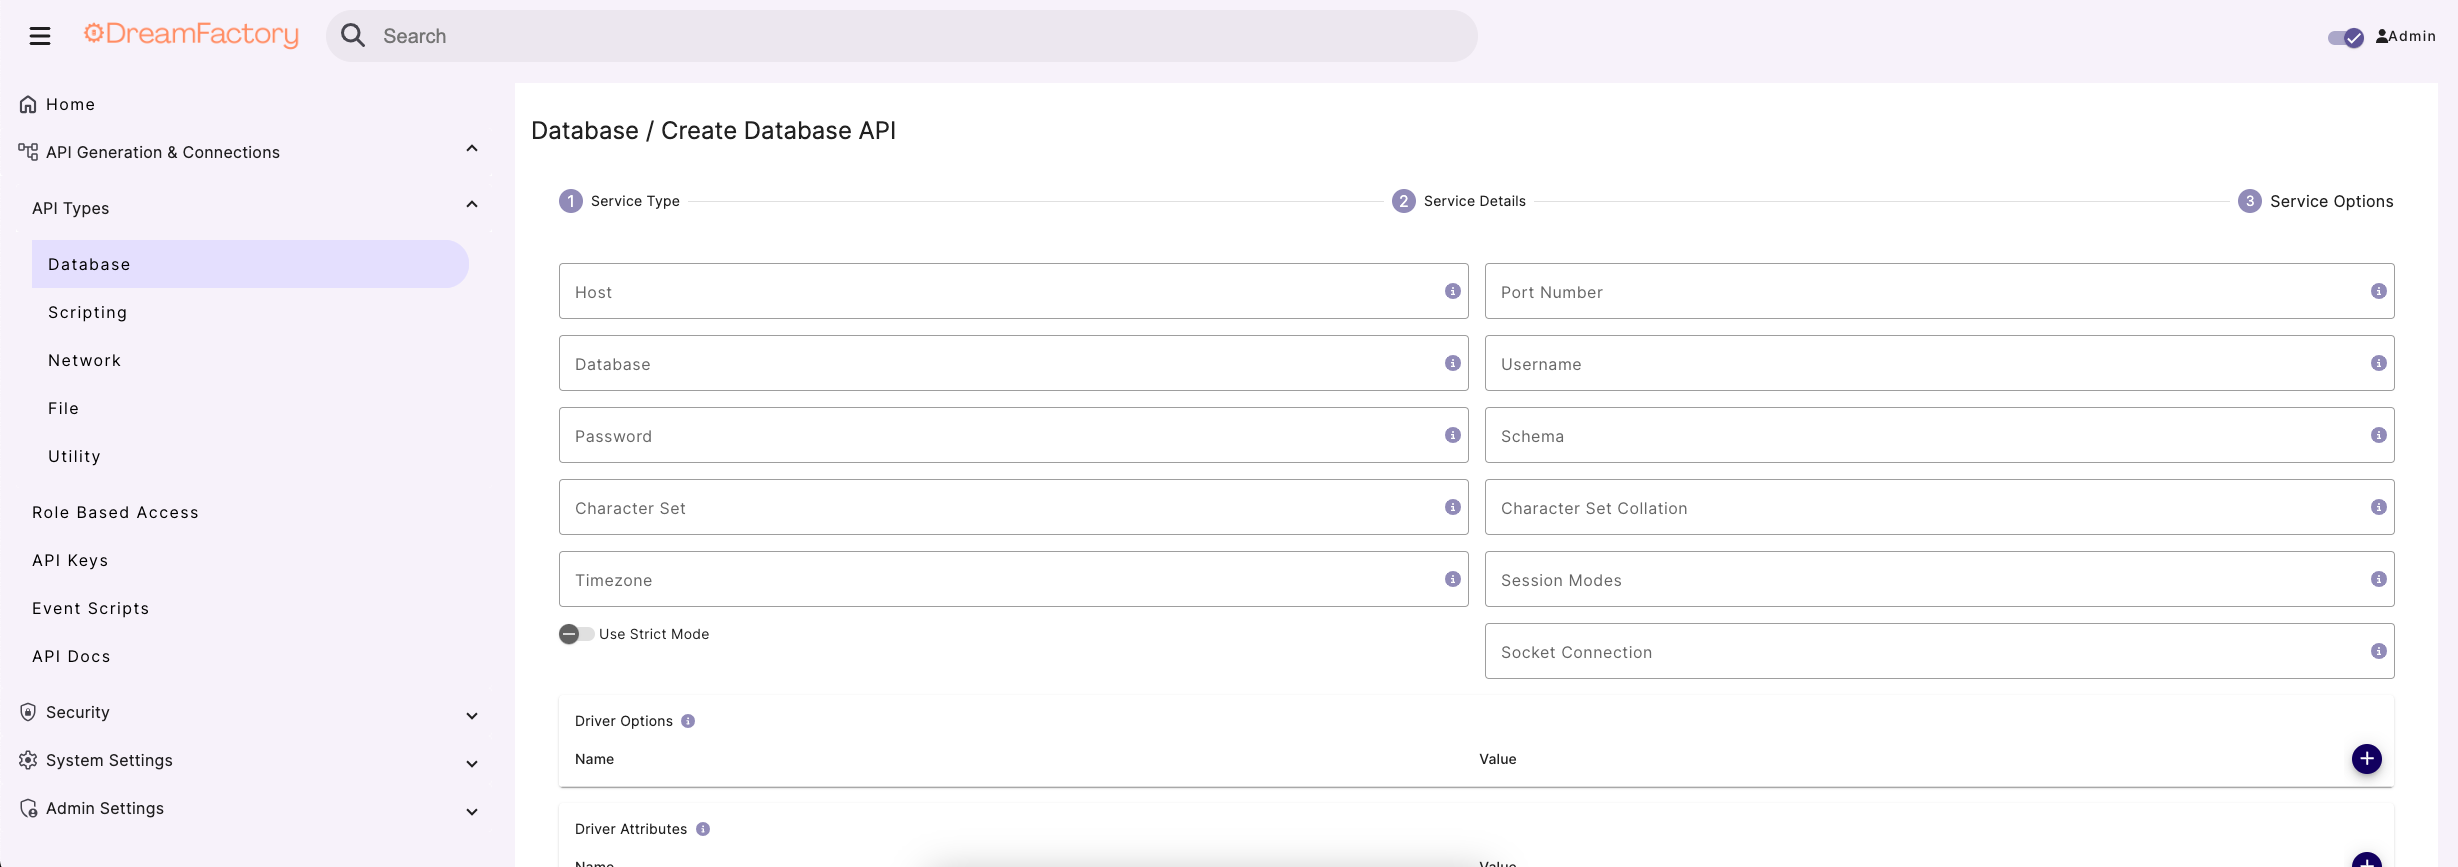
This form might look a bit intimidating at first, however in most cases there are only a few fields you need to complete. Let's cover those first, followed by an overview of the optional fields.
Required configuration fields
There are only five (sometimes six) fields you need to completed in order to generate a database-backed API. These include:
- Host: The database server's host address. This may be an IP address or a domain name.
- Port Number: The database server's port number. For MySQL this is 3306.
- Database: The name of the database you'd like to expose via the API.
- Username: The username associated with the database user account used to connect to the database.
- Password: The password associated with the database user account used to connect to the database.
- Schema: If your database supports the concept of a schema, you may specify it here. MySQL doesn't support the concept of a schema, but many other databases do.
Keep in mind you are generating an API which can in fact interact with the underlying database! While perhaps obvious, once you generate this API it means any data or schema manipulation requests you subsequently issue will affect your database. Therefore be sure to connect to a test database when first experimenting with DreamFactory so you don't issue requests that you later come to regret.
Optional Configuration Fields
Following the required fields there are a number of optional parameters. These can and do vary slightly according to the type of database you've selected, so don't be surprised if you see some variation below. Don't worry about this too much at the moment, because chances are you're not going to need to modify any of the optional configuration fields at this time. However we'd like to identify a few fields which are used more often than others:
- Maximum Records: You can use this field to place an upper limit on the number of records returned.
- Data Retrieval Caching Enabled: Enabling caching dramatically improves performance. This field is used in conjunction with
Cache Time to Live, introduced next. - Cache Time to Live (minutes): If data caching is enabled, you can use this field to specify the cache lifetime in minutes.
After completing the required fields in addition to any desired optional fields, click Save to generate your API. After a moment a pop up message displays indicating Service Saved Successfully and you are redirected to your API Documentation. Congratulations you've just generated your first database-backed API! So what can you do with this cool new toy? Read on to learn more.
A note about API capabilities
Most databases employ a user authorization system which gives administrators the ability to determine exactly what a user can do after successfully establishing a connection. In the case of MySQL, privileges are used for this purpose. Administrators can grant and revoke user privileges, and in doing so determine what databases a user can connect to, whether the user can create, retrieve, update, and delete records, and whether the user has the ability to manage the schema.
Because DreamFactory connects to your database on behalf of this user, the resulting API is logically constrained by that user's authorized capabilities. DreamFactory does however display a complete set of Swagger documentation regardless, so if you are attempting to interact with the API via the Swagger docs or using any other client and aren't obtaining the desired outcome, check your database user permissions to confirm the user is authorized to carry out the desired task.
Also keep in mind this can serve as an excellent way to further lock down your API. Although DreamFactory offers excellent security-related features for restricting API access, it certainly doesn't hurt to additionally configure the connecting database user's privileges to reflect the desired API capabilities. For instance, if you intend for the API to be read-only, then create a database user with read-only authorization. If API read and create capabilities are desired, then configure the user accordingly.
How to setup a MySQL API through an SSH tunnel
If you prefer DreamFactory to connect to your MySQL database through an SSH tunnel, then this is a relatively easy process, and can be done by starting an SSH tunnel from within your DreamFactory server. First add your database server's key to where your DreamFactory instance is located. Then open up a terminal window and enter the following command, replacing where necessary:
ssh -N -L <anOpenHostPort>:127.0.0.1:<mySqlPortOfDBServer> computerUser@<ip> -i <pathToKey>
For example, if I want to use port 3307 on my DreamFactory server to connect to the default database port of my MySQL server (3306), and "admin" is the remote SSH user who has the necessary privileges, the command looks like this:
ssh -N -L 3307:127.0.0.1:3306 [email protected] -i ./server_key
Once the connection has been established, in the DreamFactory interface, you can create your service in the same manner as described above. Instead of pointing to the MySQL server, you point it to the SSH tunnel (localhost).

And that's it! You now have the same capabilties as you would with a standard MySQL-backed API, just connected through SSH.
Remember that your SSH user (which is used when creating your tunnel from the command line) is most likely different to your MySQL user (which is added in DreamFactory when creating your service).
Interaction using Postman
Installation
Postman is a utility that allows you to quickly test and use REST APIs. To use the latest published version, click Run in Postman below to import the DreamFactory MYSQL API as a collection:
You can also download the collection file from this repo, then import directly into Postman.
Interacting with your API via the API Docs
The Service Saved Successfully message which appears following successful generation of a new REST API is rather anticlimactic. This simple message really doesn't convey exactly how much tedious work DreamFactory has just saved you and your team. Not only did it generate a fully-featured REST API, but it also secured it from unauthorized access and additionally generated interactive OpenAPI documentation for all of your endpoints! If you haven't used Swagger before, you're in for a treat because it's a really amazing tool which allows developers to get familiar with an API without having to write any code. Additionally, each endpoint is documented with details about both the input parameters and response.
If you were not automatically redirected to this page, select the API Docs tab located on the navbar under API Generation & Connections:
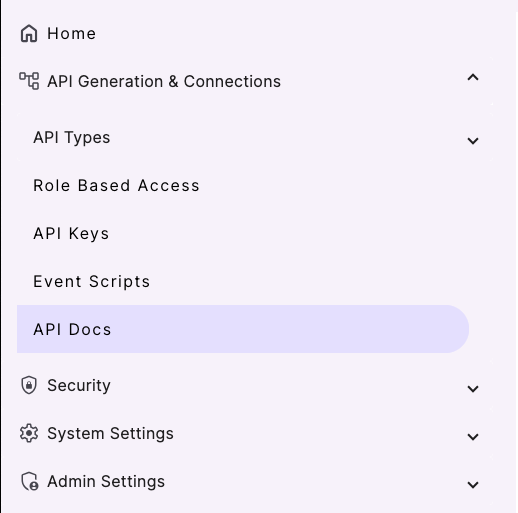
You are presented with a list of all documentation associated with your DreamFactory instance. The db, email, files, logs, system, and user documentation are automatically included with all DreamFactory instances, and can be very useful should you eventually desire to programmatically manage your instance. Let's just ignore those for now and focus on the newly generated database documentation. The following screen displays:
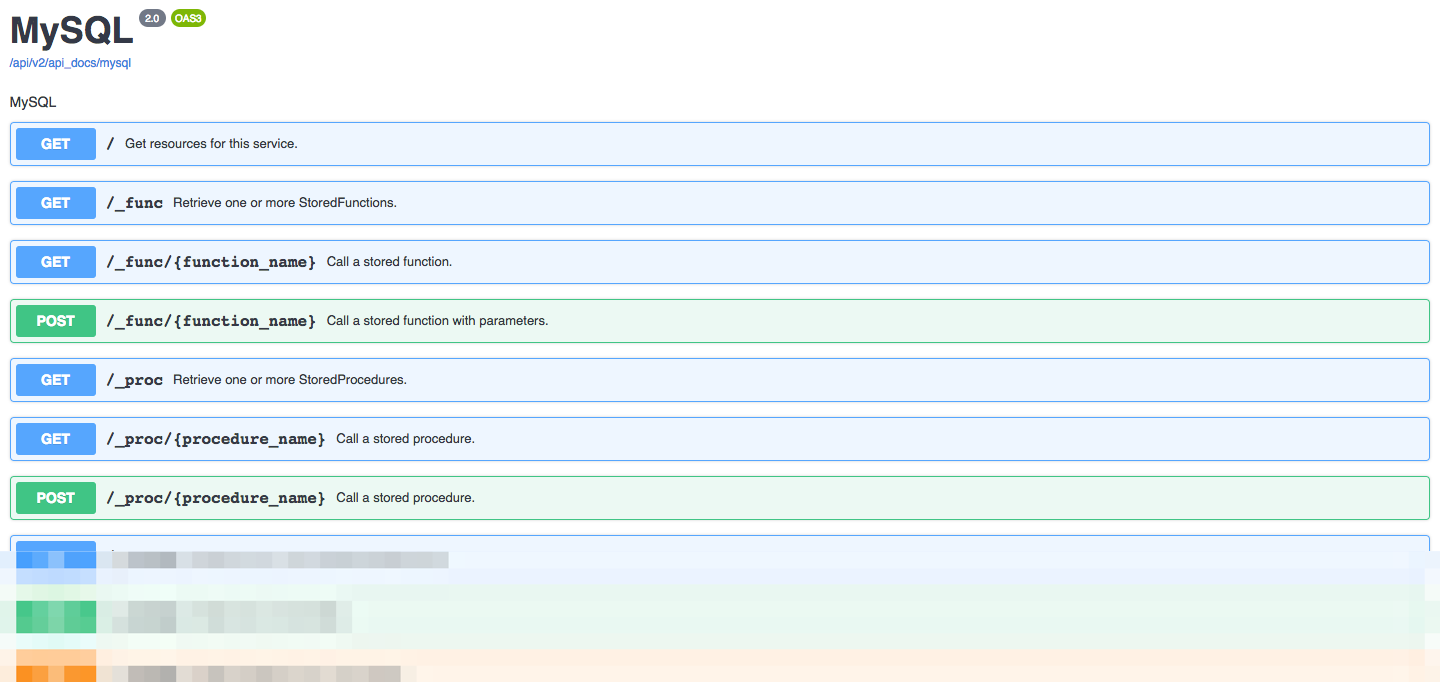
Scrolling through this list, you can see that quite a few API endpoints have been generated! If you generated an API for a database which supports stored procedures, towards the top endpoints named GET /_proc/{procedure_name} and POST /_proc/{procedure_name} are listed. Scrolling down, quite a few endpoints used to manage your schema are visible, followed by a set of CRUD (create, retrieve, update, delete) endpoints which are undoubtedly the most commonly used of the bunch.
Querying table records
Let's test the API by retrieving a set of table records. Select the GET /_table/{table_name} Retrieve one or more records entry:

A slideout window opens containing two sections. The first, Parameters, identifies the supported request parameters. The second, Responses, indicates what you can expect to receive by way of a response, including the status code and a JSON response template. In the case of the GET _/table/{table_name} endpoint, you have quite a few parameters at your disposal, because this endpoint represents the primary way in which table data is queried. By manipulating these parameters you can query for all records, or a specific record according to its primary key, or a subset of records according to a particular condition. You can also use these parameters to perform other commonplace tasks such as grouping and counting records, and joining tables.
To test the endpoint, on the right side of the page, click Try it out. When you do, the input parameter fields are enabled, allowing you to enter values to modify the default query's behavior. For the moment we're going to modify just one parameter: table_name. It's located at the very bottom of the parameter list. Enter the name of a table you know exists in the database, and press the blue Execute button. Below the button is a "Loading" icon, and soon thereafter a list of records found in the designated table are presented in JSON format. Here's an example of what you see when running this endpoint against your test MySQL database:
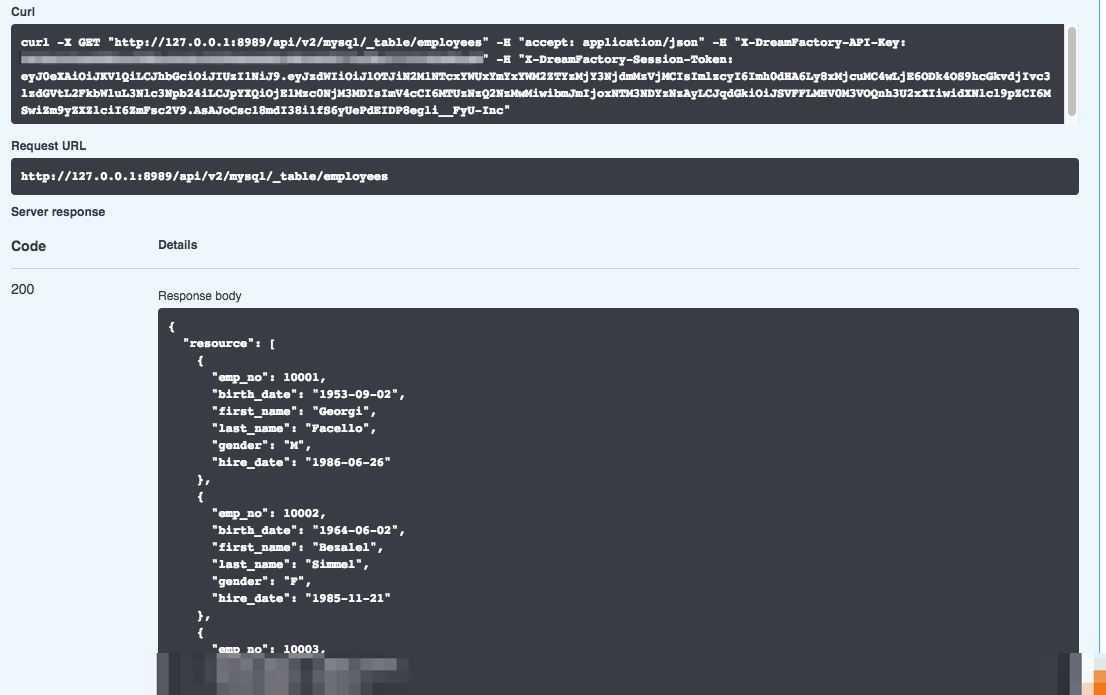
Congratulations! You've just successfully interacted with the database API using the Swagger documentation. If you don't see a list of records, confirm the following:
- Does the specified table exist?
- If you received a
500status code, check the service configuration credentials. The500code almost certainly means DreamFactory was unable to connect to the database. If everything checks out, make sure you can connect to the database from the DreamFactory instance's IP address via the database port. If you can't then it's probably a firewall issue.
The API Docs interface is fantastically useful for getting familiar with an API, and we encourage you to continue experimenting with the different endpoints to learn more about how it works. However, you'll eventually want to transition from interacting with your APIs via the API Docs interface to doing so using a third-party client, and ultimately by way of your own custom applications. So let's take that next step now, and interact with the new API using an HTTP client. In the last section you were introduced to a few such clients. We'll be using Insomnia for the following examples however there is no material differences between Insomnia, Postman, or any other similar client.
First we need to create an API key to be used to exclusively for accessing this database API. This is done by first creating Role Based Access and then assigning the Role to an API Key. Let's take care of this in the next section.
Synchronizing records between two databases * Move to Scripting Section *
You can easily synchronize records between two databases by adding a pre_process event script to the database API endpoint for which the originating data is found. To do so, navigate to the Scripts tab, select the desired database API, and then drill down to the desired endpoint. For instance, if we wanted to retrieve a record from a table named employees found within database API named mysql and send it to another database API (MySQL, SQL Server, etc.) named contacts and possessing a table named names, we would drill down to the following endpoint within the Scripts interface:
mysql > mysql._table.{table_name} > mysql._table.{table_name}.get.post_process mysql._table.employees.get.post_process
Once there, you can choose the desired scripting language. We've chosen PHP for this example, but you can learn more about other available scripting engines within our wiki documentation. Enable the Active checkbox, and add the following script to the glorified code editor:
    // Assign the $platform['api'] array value to a convenient variable
    $api = $platform['api'];

    // Declare a few arrays for later use
    $options = [];
    $record = [];

    // Retrieve the response body. This contains the returned records.
    $responseBody = $event['response']['content'];

    // Peel off just the first (and possibly only) record
    $employee = $responseBody["resource"][0];

    // Peel the employee record's first_name and last_name values,
    // and assign them to two array keys named first and last, respectively.
    $record["resource"] = [
        [
            'first' => $employee["first_name"],
            'last' => $employee["last_name"],
        ]
    ];

    // Identify the location to which $record will be POSTed
    // and execute an API POST call.
    $url = "contacts/_table/names";
    $post = $api->post;
    $result = $post($url, $record, $options);
Save the changes, making sure the script's Active checkbox is enabled. Then make a call to the employees table which results in the return of a single record, such as:
/api/v2/mysql/_table/employees?filter=emp_no=10001
Of course, there's nothing stopping you from modifying the script logic to iterate over an array of returned records.
Obfuscating a table endpoint * Move to Scripting Section *
Sometimes you might want to completely obfuscate the DreamFactory-generated database API endpoints, and give users a URI such as /api/v2/employees rather than /api/v2/mysql/_table/employees. At the same time you don't want to limit the ability to perform all of the usual CRUD tasks. Fortunately this is easily accomplished using a scripted service. The following example presents the code for a scripted PHP service that has been assigned the namespace employees:
    $api = $platform['api'];
    $get = $api->get;
    $post = $api->post;
    $put = $api->put;
    $patch = $api->patch;
    $delete = $api->delete;

    $api_path = 'mysql/_table/employees';

    $method = $event['request']['method'];

    $options = [];

    $params = $event['request']['parameters'];

    $result = '';

    $resource = $event['response']['content']['resource'];

    if ($resource && $resource !== '') {
      $api_path = $api_path + '/' . $resource;
    }

    if ($event['request']['payload']) {
      $payload = $event['request']['payload'];
    } else {
      $payload = null;
    }

    switch ($method) {
      case 'GET':
          $result = $get($api_path, null, $options);
          break;
      case 'POST':
          $result = $post($api_path, $payload, $options);
          break;
      case 'PUT':
          $result = $put($api_path, $payload, $options);
          break;
      case 'PATCH':
          $result = $patch($api_path, $payload, $options);
          break;
      case 'DELETE':
          $result = $delete($api_path, $payload, $options);
          break;
      default:
          $result = "error";
          break;
    }

    return $result;
With this script in place, you can use the following endpoint to interact with the MySQL API's employees table:
https://dreamfactory.example.com/api/v2/employees
Issuing a GET request to this endpoint returns all of the records. Issuing a POST request to this endpoint with a body such as the following inserts a new record:
    {
        "resource": [
        {
          "emp_no": 500037,
          "birth_date": "1900-12-12",
          "first_name": "Joe",
          "last_name": "Texas",
          "gender": "m",
          "hire_date": "2007-01-01"
        }
        ]
    }
Troubleshooting
If you'd like to see what queries are being executed by your MySQL database, you can enable query logging. Begin by creating a file named query.log in your Linux environment's /var/log/mysql directory:
$ cd /var/log/mysql $ sudo touch query.log
Next, make sure the MySQL daemon can write to the log. You might have to adjust the user and group found in the below chmod command to suit your particular environment:
$ sudo chown mysql.mysql /var/log/mysql/query.log $ sudo chmod u+w /var/log/mysql/query.log
Finally, turn on query logging by running the following two commands:
mysql> SET GLOBAL general_log_file = '/var/log/mysql/query.log'; Query OK, 0 rows affected (0.00 sec)
mysql> SET GLOBAL general_log = 'ON'; Query OK, 0 rows affected (0.00 sec)
To view your executed queries in real-time, tail the query log:
$ tail -f /var/log/mysql/query.log
/usr/sbin/mysqld, Version: 5.7.19-0ubuntu0.16.04.1 ((Ubuntu)). started with:
Tcp port: 3306 Unix socket: /var/run/mysqld/mysqld.sock
Time Id Command Argument
2019-03-28T14:50:19.758466Z 76 Quit
2019-03-28T14:50:31.648530Z 77 Connect [email protected] on employees using TCP/IP
2019-03-28T14:50:31.648635Z 77 Query use employees
2019-03-28T14:50:31.648865Z 77 Prepare set names 'utf8' collate 'utf8_unicode_ci'
2019-03-28T14:50:31.648923Z 77 Execute set names 'utf8' collate 'utf8_unicode_ci'
2019-03-28T14:50:31.649029Z 77 Close stmt
2019-03-28T14:50:31.649305Z 77 Prepare select first_name, hire_date from employees.employees limit 5 offset 0
2019-03-28T14:50:31.649551Z 77 Execute select first_name, hire_date from employees.employees limit 5 offset 0
2019-03-28T14:50:31.649753Z 77 Close stmt
2019-03-28T14:50:31.696379Z 77 Quit
Checking your user credentials
Many database API generation issues arise due to a misconfigured set of user credentials. These credentials must possess privileges capable of connecting from the IP address where DreamFactory resides. To confirm your user can connect from the DreamFactory server, create a file named mysql-test.php and add the following contents to it. Replace the HOSTNAME, DBNAME, USERNAME, and PASSWORD placeholders with your credentials:
    <?php

    $dsn = "mysql:host=HOSTNAME;dbname=DBNAME";
    $user = "USERNAME";
    $passwd = "PASSWORD";

    $pdo = new PDO($dsn, $user, $passwd);

    $stmt = $pdo->query("SELECT VERSION()");

    $version = $stmt->fetch();

    echo $version[0] . PHP_EOL;
Save the changes and run the script like so:
    $ php mysql-test.php
    5.7.29-0ubuntu0.16.04.1
If the MySQL version number isn't returned, then the user is unable to connect remotely.
Logging your database queries
If you want to see the database queries being generated by DreamFactory, open the .env file, and in 'Database Settings' the following details are visible:
#DB_QUERY_LOG_ENABLED=false
Uncomment and set the DB_QUERY_LOG_ENABLED value to true, and also set APP_LOG_LEVEL=debug. Whenever you make a database query, the statement is sent to the log file (found in storage/logs/dreamfactory.log). A typical output to the log looks like this:
[2021-05-28T05:47:10.965487+00:00] local.DEBUG: API event handled: mysqldb._table.{table_name}.get.pre_process
[2021-05-28T05:47:10.966765+00:00] local.DEBUG: API event handled: mysqldb._table.employees.get.pre_process
[2021-05-28T05:47:12.388272+00:00] local.DEBUG: service.mysqldb: select `emp_no`, `birth_date`, `first_name`, `last_name`, `gender`, `hire_date` from `xenonpartners`.`employees` limit 2 offset 0: 1385.25
[2021-05-28T05:47:12.392063+00:00] local.DEBUG: API event handled: mysqldb._table.{table_name}.get.post_process
[2021-05-28T05:47:12.393794+00:00] local.DEBUG: API event handled: mysqldb._table.employees.get.post_process
Adding a custom log message to your database queries
When using a scripted service, and with DB_QUERY_LOG_ENABLED set to true, it is possible to add a custom log message using the following syntax:
use Log;

...

if (config('df.db.query_log_enabled')) {
    \Log::debug(<your message>);
}

...
See this section for more information about logging.
Using extensions with your databases (PostgreSQL)
PostgreSQL has a number of extensions to enhance database capabilities. One of the most popular is PostGIS and its topology functionality for representing vector data.
If your PostgreSQL database uses this (or any other) extension, when using DreamFactory to make an API call (especially a function or procedure), you may see this error, or something similar to it:
"error": {
    "code": 500,
    "context": null,
    "message": "Failed to call database stored function.\nSQLSTATE[42883]: Undefined function: 7 ERROR:  function st_setsrid(public.geometry, integer) does not exist
    ...
}
This is most likely occuring because the extension's functions are located in a different schema to the schema used by the database, and the postgreSQL user that DreamFactory has been assigned, as a result, cannot see it.
In order for DreamFactory to be able to see the extension's functions, you should add this line to the Additional SQL Statements setting (change to match the extensions and schemas you are using) which you can find in your postgres service's Configuration tab's Optional Advanced Settings.
SET search_path TO "$user", public, postgis, topology;

This allows DreamFactory to search through additional schemas to find the functions that the database requires when using any extensions.